8 STAGES OF A SOLAR PROJECT
Solar home projects normally last 4-8 weeks. From date of hire to the day your solar is up and running. Some solar companies operate faster and more efficiently than others. The same can be said for building departments and municipalities. Occasionally, PG&E will surprise us by operating at a swift pace processing Net Metering applications, but most of the time they seem content to move at a snail’s pace. No one home or city is the same, but every solar project will proceed through 8 specific stages. Let’s get into it.
Solar home projects normally last 4-8 weeks. From date of hire to the day your solar is up and running. Some solar companies operate faster and more efficiently than others. The same can be said for building departments and municipalities. Occasionally, PG&E will surprise us by operating at a swift pace processing Net Metering applications, but most of the time they seem content to move at a snail’s pace. No one home or city is the same, but every solar project will proceed through 8 specific stages. Let’s get into it.
1. PG&E Bill Audit - This is a deep dive into your PG&E account to review your home’s past energy consumption and what it might require in the future. This is where a good solar consultant comes in handy. You might find there’s a few cost-effective improvements you could make before going solar which means less solar panels to purchase and that keeps more money in your pocket. Maybe it’s a good idea to ditch that old single speed pool pump and replace it with an energy efficient variable speed pump. What if you’ll be empty nesters in a couple years and anticipate a drop in your home’s electricity usage? Or considering the purchase of an electric car which will need to be charged nightly. By the end of the first stage you should have a firm grasp on exactly how many solar panels you’ll need to kick your PG&E electric bill to the curb.
2. Choose Your Solar Company - This is the homework stage. Here you’re thumbing through bids collected from a few different companies and devoting some time towards vetting those contractors under your consideration. Which company is a perfect match? Talk to your friends and ask what their solar experience was like and review what neighbors are saying about those companies on Yelp and NextDoor. If you want your solar project to get an A+ you must prepare by doing your homework first.
3. Site Survey – Your newly hired solar contractor will now engineer a solar design which is a literal blueprint and plan of your project. A technician will be dispatched to your home to perform a Site Survey which includes an inspection of your main electrical panel to ensure it’s compatible with a new solar electric system. The technician will climb atop your roof assessing its condition, measure and mark the roof to indicate where each of the solar panels will be situated. Hopefully, he or she also constructs a shade analysis to confirm that the solar production estimates that were illustrated in your initial solar bid will be fulfilled.
4. Pulling the Permit – Once the site survey is complete and you’ve approved the layout of your solar panels it’s time to submit the blueprint plan to the local building department or AHJ (Authorized Housing Jurisdiction). They will review your contractor’s solar design to make sure it’s code compliant and if approved, will issue a building permit to authorize the construction of your project.
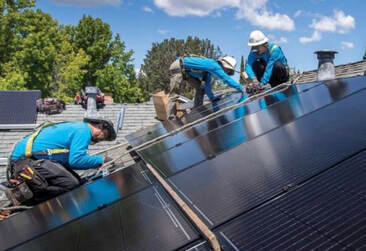
5. Installation Day – With the building permit in hand your project is ready to be installed. Solar panels, conduit and railing, all related equipment can normally be installed in 1-2 days with a crew of 2 persons. Maybe 3 days if your system includes 40+ panels or requires additional work outside the normal scope of a project. Say, for example your project includes a battery storage system or significant roof repairs. Some companies are expeditious. Others take their sweet ass time.
6. Permit Sign Off – Once your project is fully installed your solar company will contact the building department to schedule a final inspection. An inspector will come out to the house and ensure your solar is installed to code, safe to operate and works properly. If the system looks good, the inspector will sign off on the permit thus approving the installation. Note, this shouldn’t be an appointment between just you and the inspector. Your solar company should be sending its representative to your home to meet personally with the inspector. Once the inspector stamps the permit card “approved” we’re moving on to the stage 7.
7. Permission To Operate (PTO) – The final inspection has been completed and the building department has signed off on your solar project. We’re not quite done yet though. We still need to get PG&E’s seal of approval. We call this ‘getting PTO’. The solar company sends the signed off permit to PG&E thus notifying them your solar panels are ready to be turned on. PG&E will review your solar application and countersign your Net Metering Agreement. You and your solar company will receive a notice from PG&E that states “your new solar generating system is granted permission to operate.” It’s funny to me how they word it. Like somehow they’re bestowing an impressive gift upon your home so you better be grateful.
8. Wrap Up – Your solar is activated, congratulations! A representative from the solar company will provide some sort of Wrap Up consultation by phone or in person. At the Wrap Up you can bring up any lingering questions you may still have about the project. The representative will perform a demo of your Solar Monitoring platform and help you download if available, a monitoring APP to your phone so you can keep an eye on your solar performance. It’s pretty cool. You’ll view exactly how much money you’re saving, how many kilowatt hours (kWh) your solar panels produced today, yesterday, and yesteryear! Oh, and how many pounds of C02 emissions you’ve offset with your solar. It’s a wonderous feeling going green and saving green.
2. Choose Your Solar Company - This is the homework stage. Here you’re thumbing through bids collected from a few different companies and devoting some time towards vetting those contractors under your consideration. Which company is a perfect match? Talk to your friends and ask what their solar experience was like and review what neighbors are saying about those companies on Yelp and NextDoor. If you want your solar project to get an A+ you must prepare by doing your homework first.
3. Site Survey – Your newly hired solar contractor will now engineer a solar design which is a literal blueprint and plan of your project. A technician will be dispatched to your home to perform a Site Survey which includes an inspection of your main electrical panel to ensure it’s compatible with a new solar electric system. The technician will climb atop your roof assessing its condition, measure and mark the roof to indicate where each of the solar panels will be situated. Hopefully, he or she also constructs a shade analysis to confirm that the solar production estimates that were illustrated in your initial solar bid will be fulfilled.
4. Pulling the Permit – Once the site survey is complete and you’ve approved the layout of your solar panels it’s time to submit the blueprint plan to the local building department or AHJ (Authorized Housing Jurisdiction). They will review your contractor’s solar design to make sure it’s code compliant and if approved, will issue a building permit to authorize the construction of your project.
5. Installation Day – With the building permit in hand your project is ready to be installed. Solar panels, conduit and railing, all related equipment can normally be installed in 1-2 days with a crew of 2 persons. Maybe 3 days if your system includes 40+ panels or requires additional work outside the normal scope of a project. Say, for example your project includes a battery storage system or significant roof repairs. Some companies are expeditious. Others take their sweet ass time.
6. Permit Sign Off – Once your project is fully installed your solar company will contact the building department to schedule a final inspection. An inspector will come out to the house and ensure your solar is installed to code, safe to operate and works properly. If the system looks good, the inspector will sign off on the permit thus approving the installation. Note, this shouldn’t be an appointment between just you and the inspector. Your solar company should be sending its representative to your home to meet personally with the inspector. Once the inspector stamps the permit card “approved” we’re moving on to the stage 7.
7. Permission To Operate (PTO) – The final inspection has been completed and the building department has signed off on your solar project. We’re not quite done yet though. We still need to get PG&E’s seal of approval. We call this ‘getting PTO’. The solar company sends the signed off permit to PG&E thus notifying them your solar panels are ready to be turned on. PG&E will review your solar application and countersign your Net Metering Agreement. You and your solar company will receive a notice from PG&E that states “your new solar generating system is granted permission to operate.” It’s funny to me how they word it. Like somehow they’re bestowing an impressive gift upon your home so you better be grateful.
8. Wrap Up – Your solar is activated, congratulations! A representative from the solar company will provide some sort of Wrap Up consultation by phone or in person. At the Wrap Up you can bring up any lingering questions you may still have about the project. The representative will perform a demo of your Solar Monitoring platform and help you download if available, a monitoring APP to your phone so you can keep an eye on your solar performance. It’s pretty cool. You’ll view exactly how much money you’re saving, how many kilowatt hours (kWh) your solar panels produced today, yesterday, and yesteryear! Oh, and how many pounds of C02 emissions you’ve offset with your solar. It’s a wonderous feeling going green and saving green.